There’s a special day coming up this weekend – it’s Mother’s Day on Sunday, May 10! How does your family celebrate the day? Do you like to spend time with one another watching movies and laying low, or do you invite friends, neighbors or extended family members over for a special meal?
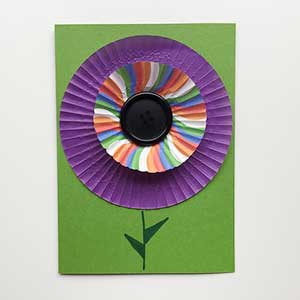
No matter how you like to celebrate, creating a handmade gift for mom is always appreciated. I’ve got a fun idea for a simple card that’s big on color and low on supplies needed – making it just the right gift to give a special lady this weekend.
Materials
- Blank folded card (I used a clover A6 folded card from Paper Source, but you can make your own card by simply folding over a blank piece of cardstock)
- Cupcake liners in standard and mini sizes
- Buttons
- Glue stick
- Super tape
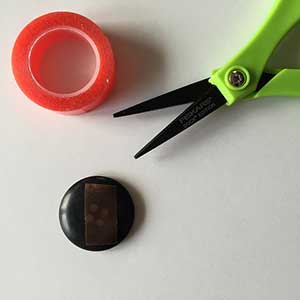
- Scissors
- Markers
Instructions
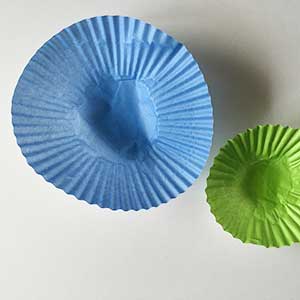
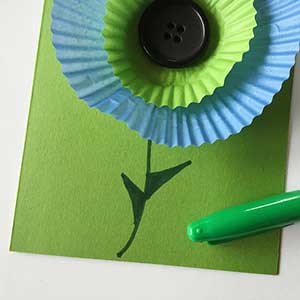
To create the flower on the front of this card, select one standard and one mini cupcake liner. Flatten the cups by gently pressing down and smoothing the edges with your fingers.
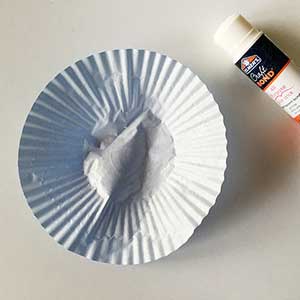
Next, turn the larger cupcake liner over and apply glue in the center of the cup. We’re not gluing the entire back of the card as we want ridges to pop up and off of the card.
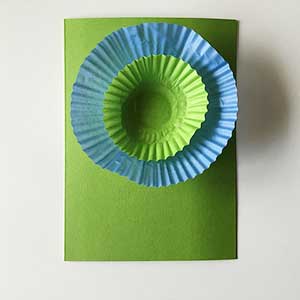
Place the larger liner on the card toward the top. Repeat the same process of gluing the back center of the cup for the smaller liner.
Cut a piece of super tape the same size as the back of your button. Remove the plastic backing from the tape to expose the adhesive. Center the button in the middle of the smaller cupcake liner and press into place.
Complete your cupcake liner flower by adding a stem at the bottom of the card’s front and a special message inside.
If you plan on mailing this card, it’s not a bad idea to go against the direction in the previous step of gluing just the center and apply glue to the entire back of the liners. This will keep the papers flat to the card and safer for mailing. It’s a good idea to double check the postage needed to mail the card as the button will provide a bumpy shape inside the envelope.