
Sew lovers, rejoice – this is your month! Sept. 1 officially kicked off National Sewing Month, a time dedicated to “recognizing the importance of home sewing to our nation,” as stated by former President Ronald Reagan in 1982. While these days the month is more about sharing the love of sewing with others, it’s still a great time to try a new hobby or show off your skills to family and friends.
For children, learning how to sew is an impressive skill. Just this year my 5-year-old nephew expressed an interest in learning how to sew and I couldn’t have been more excited. Being able to operate a sewing machine to make something with your own two hands is brag-worthy for young crafters! When it comes to finding the right machine for a child, I avoid the toy options and look for a smaller-scale version instead. Too many times the toy machines lack so much functionality they become too frustrating to work with for a child. Grandma Likes to Sew has a helpful roundup with some of her favorite smaller machines on the market today.
You don’t need a fancy project to start a child’s sewing journey (or yours, for that matter). Practicing sewing straight lines is the best way to go. A great way to practice is to take a piece of lightweight canvas and mark several straight lines on it with a marker. Have your child follow the lines to practice.
Once a few practice rounds are under their belts, it’s time for a fun project. A simple banner reinforces simple sewing while making something fun to show off.
Materials
- Fabric: 1 piece of lightweight canvas, 1 piece of solid color cotton
- Fabric: A piece of novelty fabric with scenes or characters to cut out
- Sewing machine and thread
- Scissors
- Ruler
- Safety pins
- Small wooden dowel or chopstick
- Yarn
- Clothes pins
Instructions
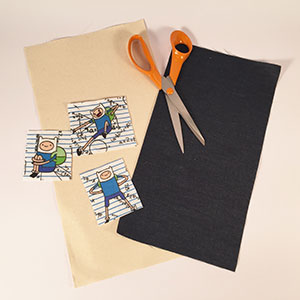
Start out by cutting out all of the fabric you’ll use to make this vertical banner. You can make it any size you like; for our banner, I cut the canvas to 7 inches wide by 13 inches tall and the navy fabric to 6 inches wide and 12 inches tall. You’ll use the novelty fabric to make simple “appliques” for the banner, so cut out whichever designs you like. I found this fun “Adventure Time” flannel at Joann Fabric and Crafts, so I cut out three different Finns to use.
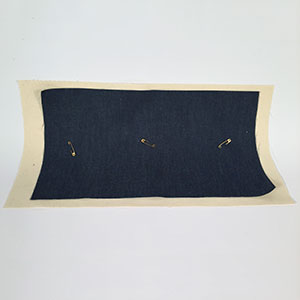
Center the solid fabric on top of the canvas and pin into place so it doesn’t move while sewing.
(Why canvas? It doesn’t move around as much, so it can helpful for smaller hands to control.)
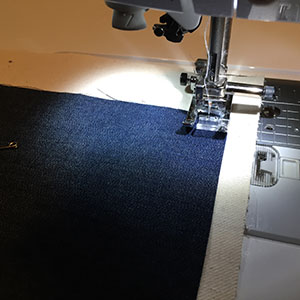
Starting at one corner of the solid fabric, insert the needle into the fabric, lower the presser foot and start to sew!
Continue sewing all the way around the solid fabric so that is secured into place on the canvas. Once that is done, remove it from the machine and remove your safety pins.
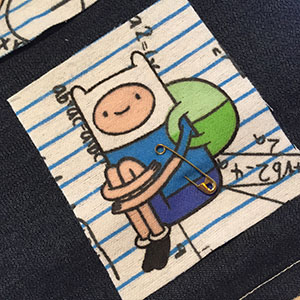
Next, place your novelty fabric onto the solid fabric to create your design. Pin into place.
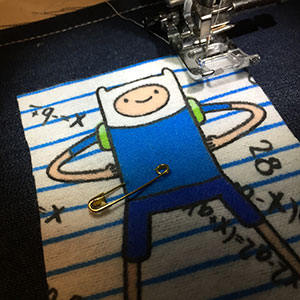
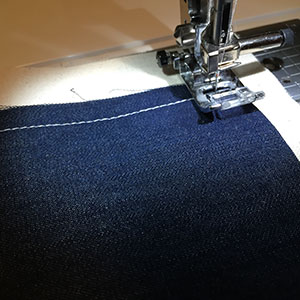
Just you like did for the solid fabric, sew around the perimeter of your novelty fabric. Once the sewing is done, trim any loose threads from the banner. Wrap a piece of yarn around a small wooden dowel road to create a hanger and pin your banner onto it with clothespins. Your banner is all set and you’ve just mastered a simple sewing project!